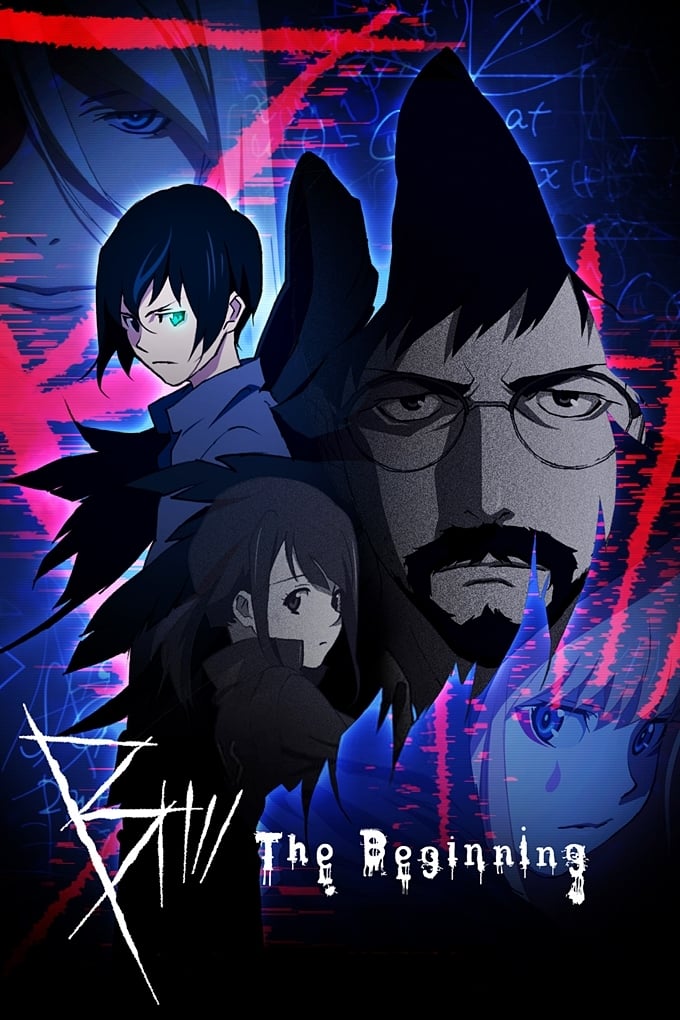
Plot Analysis Summary
A structural breakdown of the two-season storyline, mapping core arcs, thematic threads, and character trajectories across the complete series.
Story Structure — 6 Plot Phases
Season 1: Killer B Investigation
Keith returns to the RIS to tackle the brutal Killer B murders while an unknown group steals a military vehicle. The team investigates linked deaths, stakes out a high-powered party, and battles hackers over a poison gas threat. Keith pursues Koku and his gang outside the city, setting the stage for deeper institutional and personal conflicts.
Key Events
-
RIS Reunion and Killer B Case — Keith returns to the RIS to investigate a brutal double murder linked to Killer B. Characters: Keith Kazama Flick
Location: RIS Headquarters
-
Military Vehicle Theft — An unknown group steals a military vehicle, escalating the immediate threat. Characters: Keith Kazama Flick
Location: City Streets
-
Killer B Death Investigation — RIS investigates a death linked to Killer B, though Keith disagrees with the initial assessment. Characters: Keith Kazama Flick
Location: Crime Scene
-
High-Powered Party Stakeout — Another body leads the team to stake out a high-powered party. Characters: Keith Kazama Flick
Location: Private Estate
-
Poison Gas Hacker Battle — Kaela battles hackers as the poison gas release ticks closer. Characters: Keith Kazama Flick
Location: Digital Network
-
City Chase and Gang Pursuit — Keith drags Boris on a chase outside the city, pursuing Koku and one of the gang. Characters: Keith Kazama Flick, Kokuu
Location: Highway
-
Royal Library Visit — Koku and Keith both pay visits to the Royal Library. Characters: Keith Kazama Flick, Kokuu
Location: Royal Library
-
Apartment Case Discussion — Lily heads to Keith's apartment to discuss her thoughts on the Killer B case. Characters: Keith Kazama Flick, Lily Hoshina
Location: Keith's Apartment
-
Internal Attack and Traitor Reveal — The team grapples with the attack on one of their own, and the fact that there must be a traitor on the inside. Characters: Keith Kazama Flick
Location: RIS Facility
Season 1: Library and Internal Fracture
Keith and Koku visit the Royal Library, while Lily discusses case theories with Keith at his apartment. The team faces an internal attack, revealing a traitor, and Koku realizes Canopus identity. Tensions escalate as Keith is declared a murder suspect and Koku confronts him on a hospital roof.
Key Events
-
Canopus Identity Realization — Koku realizes who Canopus is. Characters: Kokuu
Location: Safe House
-
Hospital Roof Confrontation — After confronting Keith on the roof of the hospital, Koku agrees to meet him at a temple the next day. Characters: Keith Kazama Flick, Kokuu
Location: Hospital Roof
-
Keith Declared Suspect — Keith is declared a murder suspect. Characters: Keith Kazama Flick
Location: RIS Command
-
Minatsuki's Attack Order — Minatsuki gives the OK for the others to attack Koku, but Keith intervenes to protect him. Characters: Kokuu
Location: RIS Command
-
RIS Ultimatum — The RIS receives an ultimatum. Characters: Keith Kazama Flick
Location: RIS Command
-
Eric's Plea and Lily's Suspension — Eric implores Keith to return to the RIS, then suspends Lily in an effort to track Keith down. Characters: Keith Kazama Flick, Lily Hoshina
Location: RIS Command
-
Takeru Deployment — Minatsuki sends Takeru after Koku. Characters: Kokuu
Location: City Streets
-
Keith's Surrender — Keith turns himself in and the RIS decides to spend the few remaining hours laying a trap for the suspected head of Market Maker, using Lily as bait. Characters: Keith Kazama Flick
Location: RIS Headquarters
Season 1: Ultimatum and Bait Trap
Minatsuki orders an attack on Koku, but Keith intervenes to protect him. The RIS receives an ultimatum, and Eric suspends Lily to track Keith. Keith turns himself in, and the team lays a trap using Lily as bait to catch the Market Maker head. Koku searches for the zeppelin while Keith pursues Gilbert.
Key Events
-
Lily as Bait — Lily is positioned as bait to lure the Market Maker head. Characters: Lily Hoshina
Location: Trap Location
-
Zeppelin Search Begins — Koku searches for the zeppelin containing Market Maker and Yuna. Characters: Kokuu
Location: Skyline
-
Frantic Search for Gilbert and Lily — Keith, Eric and Kaela frantically search for Gilbert and Lily. Characters: Keith Kazama Flick, Lily Hoshina
Location: Urban Grid
-
Gilbert Pursuit — Keith sets off in pursuit of Gilbert once more. Characters: Keith Kazama Flick
Location: Industrial Zone
-
Zeppelin Discovery and Escape — Koku finds the zeppelin and Minatsuki, but Laica escapes with Yuna in accordance with the prophecy. Characters: Kokuu
Location: Zeppelin
-
RIS Race to Scene — The RIS races to the scene, while Keith confronts Gilbert at the old Jaula Blanca facility. Characters: Keith Kazama Flick
Location: Jaula Blanca Facility
-
Final Facility Confrontation — Keith confronts Gilbert at the old Jaula Blanca facility. Koku fights Laica for his and Yuna's survival. Characters: Keith Kazama Flick, Kokuu
Location: Jaula Blanca Facility
-
Kirisame's Approach — Koku is approached by Kirisame, a figure from his childhood who he thought was dead. Characters: Kokuu
Location: Hidden Location
-
New World Order Proposal — He asks Koku to join him in his fight for a new world order. Characters: Kokuu
Location: Hidden Location
Season 1: Zeppelin Climax and Facility Showdown
Koku locates the zeppelin and Minatsuki, but Laica escapes with Yuna per prophecy. The RIS races to the scene as Keith confronts Gilbert at the old Jaula Blanca facility. Koku fights Laica for survival, culminating in a high-stakes dual confrontation that resolves the first season's primary threats.
Key Events
-
New World Order Proposal — He asks Koku to join him in his fight for a new world order. Characters: Kokuu
Location: Hidden Location
-
Forced Violence Against Senator — Kirisame's subordinates force Koku into carrying out an act of violence against a senator. Characters: Kokuu
Location: Political District
-
Palace Break-In — Koku breaks into the royal palace. Characters: Kokuu
Location: Royal Palace
-
Palace Non-Cooperation — The royal palace refuses to fully cooperate with the RIS investigation. Characters: Lily Hoshina
Location: Royal Palace
-
Keith Disappearance Inquiry — Lily and Koku head out to get more information on Keith's disappearance. Characters: Lily Hoshina, Kokuu
Location: City Streets
-
Location Narrowing — Keith's friends narrow down possible locations where he's being held, but with Keith already starting to hallucinate from hunger, time is running out. Characters: Keith Kazama Flick
Location: Safe House
-
Ambush Defense — Koku, Izanami and Yuna have to fight off an ambush from Kirisame's subordinates. Lily gets pulled over while driving with the king in her car. Characters: Kokuu, Lily Hoshina
Location: Roadside
-
Killer B Pursuit Continues — With the RIS continuing their pursuit of Killer B, Koku goes into hiding, but Kirisame seeks him out for a final confrontation. Characters: Lily Hoshina
Location: RIS Command
-
Final Confrontation Setup — Kirisame seeks him out for a final confrontation. Characters: Kokuu
Location: Isolated Ruins
Season 2: Kirisame's Return and Forced Violence
Koku is approached by Kirisame, a childhood figure thought dead, who proposes a new world order. Kirisame's subordinates force Koku to commit violence against a senator, after which Koku breaks into the royal palace. The palace refuses full cooperation with the RIS investigation.
Key Events
-
RIS Reunion and Killer B Case — Keith returns to the RIS to investigate a brutal double murder linked to Killer B. Characters: Keith Kazama Flick
Location: RIS Headquarters
-
Military Vehicle Theft — An unknown group steals a military vehicle, escalating the immediate threat. Characters: Keith Kazama Flick
Location: City Streets
-
Killer B Death Investigation — RIS investigates a death linked to Killer B, though Keith disagrees with the initial assessment. Characters: Keith Kazama Flick
Location: Crime Scene
-
High-Powered Party Stakeout — Another body leads the team to stake out a high-powered party. Characters: Keith Kazama Flick
Location: Private Estate
-
Poison Gas Hacker Battle — Kaela battles hackers as the poison gas release ticks closer. Characters: Keith Kazama Flick
Location: Digital Network
-
City Chase and Gang Pursuit — Keith drags Boris on a chase outside the city, pursuing Koku and one of the gang. Characters: Keith Kazama Flick, Kokuu
Location: Highway
-
Royal Library Visit — Koku and Keith both pay visits to the Royal Library. Characters: Keith Kazama Flick, Kokuu
Location: Royal Library
-
Apartment Case Discussion — Lily heads to Keith's apartment to discuss her thoughts on the Killer B case. Characters: Keith Kazama Flick, Lily Hoshina
Location: Keith's Apartment
-
Internal Attack and Traitor Reveal — The team grapples with the attack on one of their own, and the fact that there must be a traitor on the inside. Characters: Keith Kazama Flick
Location: RIS Facility
-
Canopus Identity Realization — Koku realizes who Canopus is. Characters: Kokuu
Location: Safe House
-
Hospital Roof Confrontation — After confronting Keith on the roof of the hospital, Koku agrees to meet him at a temple the next day. Characters: Keith Kazama Flick, Kokuu
Location: Hospital Roof
-
Keith Declared Suspect — Keith is declared a murder suspect. Characters: Keith Kazama Flick
Location: RIS Command
Season 2: Disappearance and Ambush Defense
Lily and Koku head out to gather information on Keith's disappearance. Keith's friends narrow down locations while he hallucinates from hunger. Koku, Izanami, and Yuna fight off an ambush from Kirisame's subordinates, while Lily navigates political pressure while driving with the king. The season concludes with Kirisame seeking Koku for a final confrontation.
Key Events
-
Keith Declared Suspect — Keith is declared a murder suspect. Characters: Keith Kazama Flick
Location: RIS Command
-
Minatsuki's Attack Order — Minatsuki gives the OK for the others to attack Koku, but Keith intervenes to protect him. Characters: Kokuu
Location: RIS Command
-
RIS Ultimatum — The RIS receives an ultimatum. Characters: Keith Kazama Flick
Location: RIS Command
-
Eric's Plea and Lily's Suspension — Eric implores Keith to return to the RIS, then suspends Lily in an effort to track Keith down. Characters: Keith Kazama Flick, Lily Hoshina
Location: RIS Command
-
Takeru Deployment — Minatsuki sends Takeru after Koku. Characters: Kokuu
Location: City Streets
-
Keith's Surrender — Keith turns himself in and the RIS decides to spend the few remaining hours laying a trap for the suspected head of Market Maker, using Lily as bait. Characters: Keith Kazama Flick
Location: RIS Headquarters
-
Lily as Bait — Lily is positioned as bait to lure the Market Maker head. Characters: Lily Hoshina
Location: Trap Location
-
Zeppelin Search Begins — Koku searches for the zeppelin containing Market Maker and Yuna. Characters: Kokuu
Location: Skyline
-
Frantic Search for Gilbert and Lily — Keith, Eric and Kaela frantically search for Gilbert and Lily. Characters: Keith Kazama Flick, Lily Hoshina
Location: Urban Grid
-
Gilbert Pursuit — Keith sets off in pursuit of Gilbert once more. Characters: Keith Kazama Flick
Location: Industrial Zone
-
Zeppelin Discovery and Escape — Koku finds the zeppelin and Minatsuki, but Laica escapes with Yuna in accordance with the prophecy. Characters: Kokuu
Location: Zeppelin
-
RIS Race to Scene — The RIS races to the scene, while Keith confronts Gilbert at the old Jaula Blanca facility. Characters: Keith Kazama Flick
Location: Jaula Blanca Facility
Genius investigator Keith Flick rejoins the royal police force just as serial killer "B" emerges. Mysterious youth Koku may be an ally, or a target.